
| Home | Projects | Car | About |
|
Laptop Flightcase 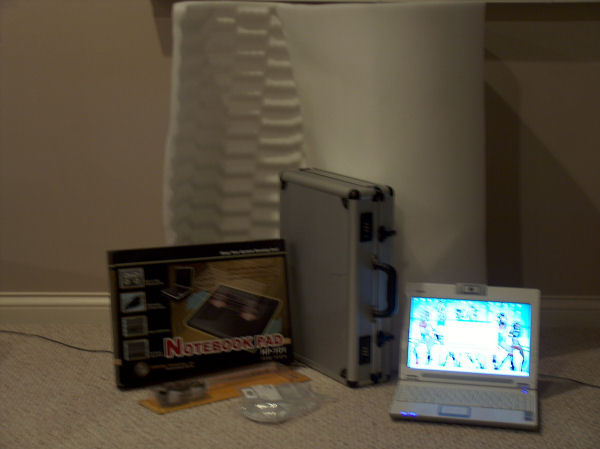 Ready to begin with the necessary parts
 The Evercool Notebook Cooler will serve as a base for the laptop
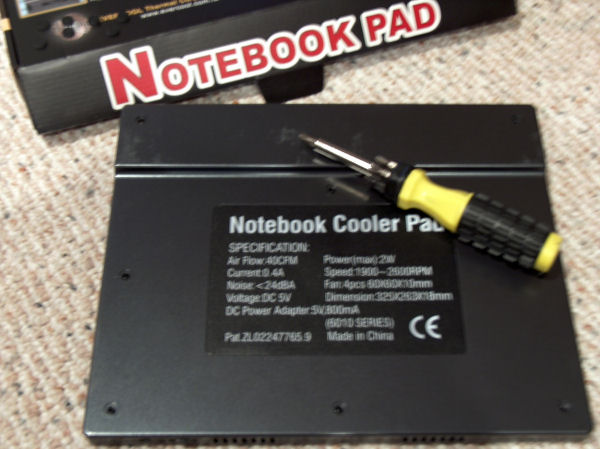 First modification: Although inexpensive, the cooler was poorly designed to suck hot air down into the base. In order to improve its efficiency, the fans will have to be flipped to blow the hot air up
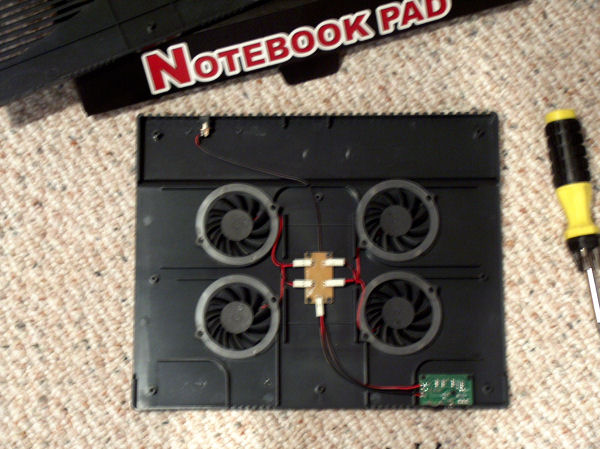 Four 60mm fans are screwed into the base. They all connect to a common power board
 The fans had to be removed and inverted. Excess plastic is trimmed, and double-sided tape is used to affix them in place
 Second modification: White bed foam is used for padding once the pockets are removed from the case. It is cut to shape with scissors
 The notebook cooler is placed at the base of the case. Foam padding is cut to surround it
 Third modification: The part layout for the cathode instillation. A standard 12" CCFL light kit will be modified to operate on USB power
 Since the cathode inverter is designed to run on 12v DC, a 5v DC inverter had to be purchased. Mouser offers a 5v CCFL inverter (BXA-502, on right) that draws <300mA of current. Its 650v AC operating voltage is sufficient to drive the cathode tube, and its small size is welcomed
 A slit is cut in the foam padding to accommodate the cathode tube
 The USB plug is stripped at the end, and the shielding is pealed back. The cable consists of two DATA wires, a +5v wire (red), and ground wire (black). The +5v and ground wires can deliver up to 500mA of current to a 5v device. They are hooked up to the inverter
 The cathode, inverter, and USB cable are wired. The cathode lights up as expected
 The cathode and USB cable are set in place, and the foam is secured using hot glue
 The system with the laptop in place. Everything functions, however the inverter only has the strength to drive ~2/3 of the cathode lamp
 The system with the lights off
 The blue cathode emits a nice glow around the laptop when the lid is raised. However, it does little to help illuminate the keyboard in low-light conditions
 In order to have a completely lit cathode, I had to replace it with a smaller one. To do that, I swapped the 12" tube for a 4" one. I also relocated it to the top of the case to better illuminate the keyboard
 A close-up of the 4" cathode. I was able to install it closer to the bezel than the first attempt with the 12" light
 The cathode lit with the lights on. It is even brighter than the first tube despite being shorter
 The cathode with the lights off. The keyboard is fully illuminated
 Since I would be using the flightcase primarily for deejaying, I decided to get it decaled with the brand logos I use. The black vinyls were machine-cut and conform nicely to the dimples on the aluminum
 The completed flightcase, both functional and fashionable
Costs:
Top |